1. This site uses cookies. By continuing to use this site, you are agreeing to our use of cookies. Learn More.

Blog Cris'... Jobs? (For Lack of a Better Name)

Discussion in 'Painting and Converting' started by Cristhian MLR, May 16, 2016.

  1. Cristhian MLR
    Terradon

    Cristhian MLR Well-Known Member

    Messages:
    592
    Likes Received:
    1,351
    Trophy Points:
    93
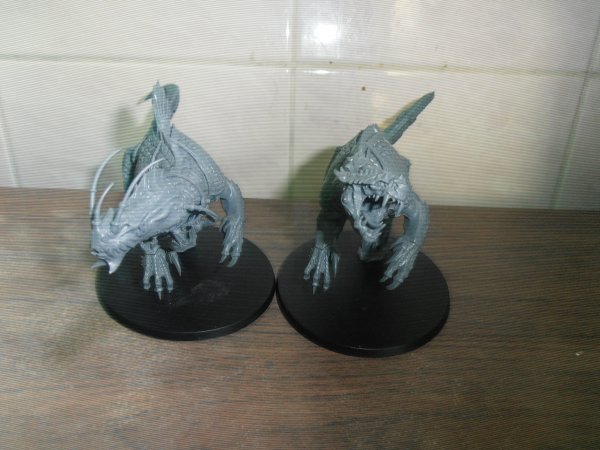
    Thats exactly the glue that I used, the carno was too heavy.

    Maybe they use oracles :cool:

    I'll share with you my progress guys, thanks a lot for you help.
     
    Lizards of Renown and Jorgik like this.
  2. n810
    Slann

    n810 First Spawning

    Messages:
    8,103
    Likes Received:
    6,520
    Trophy Points:
    113
    .... what do you mean too heavy ?
     
  3. tom ndege
    Skar-Veteran

    tom ndege Well-Known Member

    Messages:
    2,568
    Likes Received:
    5,173
    Trophy Points:
    113
    Maybe picking up the base and turning it over is not a good idea when the glue hasn't dried yet... ;)
    And as a serious reply: Maybe it helps if you clean both parts (base and model)... Maybe there are some disturbing effects of dust or oily substances they use during production. Those can have a negative effect even if you don't see or feel them...
     
  4. n810
    Slann

    n810 First Spawning

    Messages:
    8,103
    Likes Received:
    6,520
    Trophy Points:
    113
    Scoring* both surfaces helps too. ;)
    *(scratching in a checkerboard pattern)
     
    Bowser likes this.
  5. Cristhian MLR
    Terradon

    Cristhian MLR Well-Known Member

    Messages:
    592
    Likes Received:
    1,351
    Trophy Points:
    93
    Woah, this have been some long weeks and I didn't found the time to upload this.

    So, there you got, my Carno and my Troglodon.

    I also have the Cold ones from the boxes, I only have my warriors left.

    Before priming, I have some questions that I would like to share with you:
    1. I haven't glued the Warriors with shields, I want to paint them as subassemblies. Is that recomendable?
    2. How do you paint small sumbassemblies? I've seen some videos where some people just let the pieces on a plane surface, and other where they, as example, which I want to do with my Knights, glue the rider on a flying base and then glue the miniature to the mount once both of them are painted. Is practical to do that whit the shields of my warriors?
    3. The Warriors feet, how do I cut them off from that slot rectangle? There are any slot bases with the size for them? Or I have to cut them to base them? My cutters are a little too big for that, and I am a bit nervous using my knife for such a small cut.
      I have also thought on using green stuff instead cut them, so they could be on top of, lets say, rocks or little elevations.
    4. The Trog's collar is "not complete", there are two gaps between the joints, should I use green stuff to fill them?
    As always, thanks for your time.
     

    Attached Files:

    Lizards of Renown and Bowser like this.
  6. Bowser
    Slann

    Bowser Third Spawning

    Messages:
    5,581
    Likes Received:
    8,452
    Trophy Points:
    113
    There are slot bases, but if they didn't come with them, then cut it with cutters and shave it of with knife or sandpaper.

    I paint them as sub assemblies. Just laying them flat, you only really need to glue them to a flight base if you are using a special mix of paint that you may not be able to recreate.
     
    Cristhian MLR likes this.
  7. Cristhian MLR
    Terradon

    Cristhian MLR Well-Known Member

    Messages:
    592
    Likes Received:
    1,351
    Trophy Points:
    93
    Not sure about the slot bases, at least on GW range there are not 32mm slot bases, but 25mm bases. Again, my cutters are quite "hard", I've already cracked two drone antennas from my Tau miniatures.

    Now, with the flying bases... not sure, I have more than 32 shields, and only 4 flying bases left. Maybe I could glue them to toothpicks or something like that, then paint the interior of the shields.

    And of course, thanks for sharing your aideas, they are always welcomed.
     
    Last edited: Jun 29, 2016
    Lizards of Renown, Jorgik and Bowser like this.
  8. Bowser
    Slann

    Bowser Third Spawning

    Messages:
    5,581
    Likes Received:
    8,452
    Trophy Points:
    113
    A lot of people will just use blu tack or some other poster putty and stick on the part they leave unpainted to glue on. Yeah, the slot bases are 25 mm squares. So if you don't want those then y5o will have to cut. You can sand it down quite thin, then cut with the knife. Or just get a pair of cheap wire snips!
     
  9. tom ndege
    Skar-Veteran

    tom ndege Well-Known Member

    Messages:
    2,568
    Likes Received:
    5,173
    Trophy Points:
    113
    I paint the shields lying flat on a piece of kitchen towel... First the front then the back... When the basic colour has dried I do the details by sticking the shields to a bubble of this poster putty... For washing I already glue them to the mini or make sure they stay in an upright position somehow... Don't know if that is really necessary but I recommend it especially for the backside...

    For cutting off the slot piece I recommend the wire snips like @Bowser did and a sharp cutter and a file...
     
    Cristhian MLR and Bowser like this.
  10. Crowsfoot
    Slann

    Crowsfoot Guardian of Paints Staff Member

    Messages:
    8,344
    Likes Received:
    14,489
    Trophy Points:
    113
    Point by point

    1. depends, yes if you want detail, no if you just want a fast paint job.
    2. I drill a small hole in the part and insert wire then push one end into a bottle cork.
    3. Cutting mat and a small hacksaw makes light work of removing bases.
    4. depends fast paint job no, detail yes.
     
    Bowser and tom ndege like this.
  11. Cristhian MLR
    Terradon

    Cristhian MLR Well-Known Member

    Messages:
    592
    Likes Received:
    1,351
    Trophy Points:
    93
    Almost an entire lustrum since my last update? I am sorry, my brethren, for I have not followed on my army, because both a Nurglesque pandemic and my studies on ancient fossils have taken most of my time, but right now I am trying to embark myslef yet again on my path on The Great Plan, thanks to the next sunday preorders for the Broken Realms.

    This time, I am asking for your help: the new Celestial Stampede seems to costs €105, so pretty much buy two Steggies and get a free Bastie. I was thinking of finally getting a SC! Skinks and then the Steggies, but wouldn't it be better to get some Celestial Stampedes and then get Skins as I want?

    I'm asking this both as an aspiring AoS player (currently on my hometown, I'm the lone collector here and going back to University is still a long way according to the constellations) and painter.

    See you later!
     
  12. Cristhian MLR
    Terradon

    Cristhian MLR Well-Known Member

    Messages:
    592
    Likes Received:
    1,351
    Trophy Points:
    93
    Fun fact, is Children's Day for us in México today, and I got a gift for me today!

    So, for the first time, I wanted to do an unboxing! if this post get the whopping number of ONE LIKE, I will show you WHAT'S IN THE BAWKS!

    IMG_20210430_134654.jpg IMG_20210430_134631.jpg
     
  13. Cristhian MLR
    Terradon

    Cristhian MLR Well-Known Member

    Messages:
    592
    Likes Received:
    1,351
    Trophy Points:
    93
    So guys, we did, we reached the staggering number of TWO likes, surpassing the goal I stablished, so, here it is, my spawnkin:

    IMG_20210501_111011.jpg

    I managed to get myself enough Celestial Stampedes to play a full Stegageddon list, and I am so happy with it.

    I will keep you updated when I build them all, but due to a post-Nurgle attacked world, I will still have to wait a bit until I manage to paint them fully.

    My University's professor are at strike currently due to irregulation and down right lack of payments over the years, and this reached the highest point during COVID, so meanwhile I am working to help at home, and get some paints meanwhile.

    Anyway, I also want to magnetize them for easier keeping and transporting. Any help with it will be highly priced.

    See you soon, and keep save The Great Plan!
     
  14. Lizards of Renown
    Slann

    Lizards of Renown Herald of Creation

    Messages:
    10,817
    Likes Received:
    26,482
    Trophy Points:
    113
    Great to see you've got some dinosaurs. Looking forwards to seeing some pictures of your painting.
     
    Cristhian MLR likes this.
  15. Egres
    Razordon

    Egres Well-Known Member

    Messages:
    394
    Likes Received:
    1,096
    Trophy Points:
    93
    well I now know where all the boxes when!! Hehehe
     
    Imrahil and Cristhian MLR like this.
  16. Cristhian MLR
    Terradon

    Cristhian MLR Well-Known Member

    Messages:
    592
    Likes Received:
    1,351
    Trophy Points:
    93
    Thanks! I was so excited to build this that I forgot that I wanted to make a subassembly for the head and glued it right away!

    So, I want to ask for tips, since, once again, I want to take my time painting this bad boys and girls and taking them to a good standard.

    I'm not looking to win a Golden Demon award because dealing with the children of the Warp is heresy agains The Old Ones wishes, but I do want to get little details, like tongues and teeth while looking up closely.

    As such, I'd like to ask what kind of glue should I use to keep temporary binds for priming and painting, because I'm pretty sure that Model Master Liquid Cement and Tamiya Super Thin are definitvely not designed for that.

    I also have a question for any of you who have a Stega: the instructions says that you can turn the outer half of the tail 90° and glue it as an optional build, but trying to fit togheter the pieces there seems to be no way to actually glue them like that without sawing away part of the base of the tail and even then using green stuff to fill in the gaps left.

    So I think the answer is no, but if there is a way to do it like instructions says without major work I'd like a confirmation.

    Currently I have build my first box' worth of main subassemblies, keeping the dinosaurs and howdahs separated: the skinks are still on the sprues.

    My neck hurts! I love it!

    I will keep building this kits slowly during the week while I keep getting up to date with Warhammer Fest, and also because I want to saty away from the chiropractor.

    Tl;dr: As you can see, I'm quite excited with this new project, and any help you can provide with how to handle subassemblies will be greatly appreciated.

    Sotek guard you well!
     
    Noxolotl, Explodingzeb and Imrahil like this.
  17. Explodingzeb
    Bastiladon

    Explodingzeb Well-Known Member

    Messages:
    738
    Likes Received:
    2,578
    Trophy Points:
    93
    I use super glue when doing sub assemblies to attach each piece to some kind of handle or support for priming and or painting. I'm from the UK so the brand I use is Locktite. It's easy to snap the bond when you need to if you only use small amounts.
     
  18. Noxolotl
    Cold One

    Noxolotl Well-Known Member

    Messages:
    140
    Likes Received:
    423
    Trophy Points:
    63
    I don't know if that's what you are looking for but, i usually use poster tack to keep the models in one pice for priming and painting big surfaces
     

Share This Page